
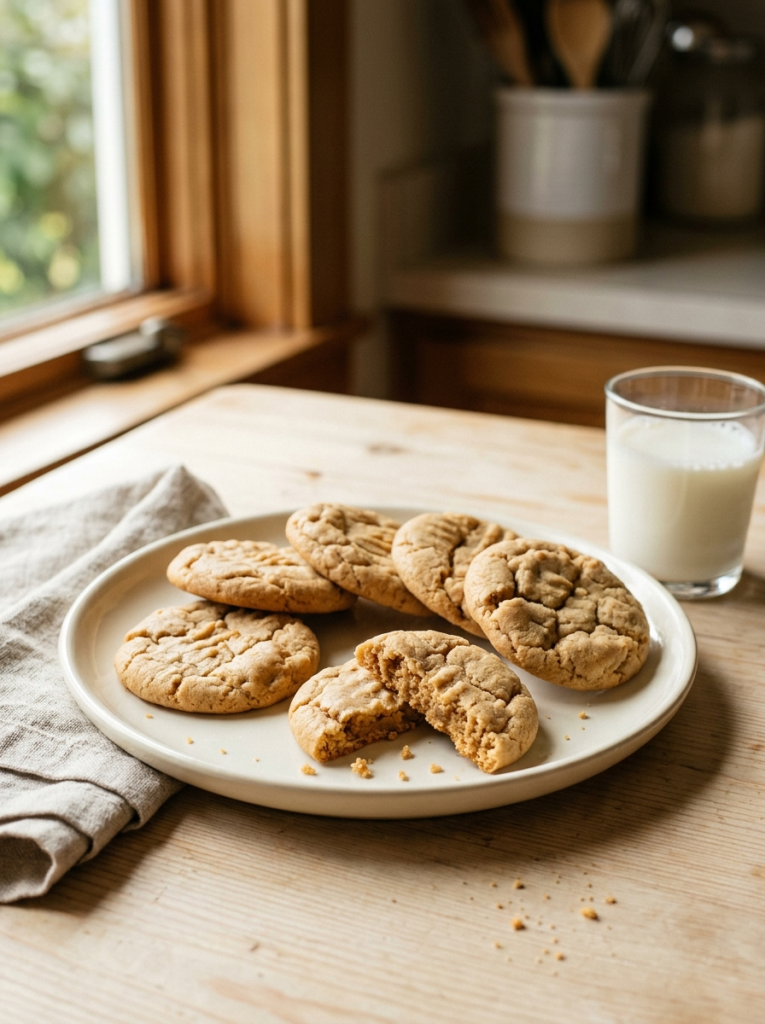
These easy cake mix peanut butter cookies turn a box of cake mix into soft, chewy cookies with plenty of creamy peanut butter flavor. The dough comes together quickly with just a handful of everyday ingredients, making these cookies especially convenient when you want a homemade treat without a complicated recipe. They bake up with lightly golden edges and soft centers that stay pleasantly chewy after cooling.
Prep Time: 10 minutes
Cook Time: 9–11 minutes
Total Time: 20–25 minutes
Servings: 24 cookies
Course: Dessert
Equipment: Mixing bowl, electric mixer or sturdy spoon, cookie scoop, baking sheets
Why You’ll Love This Recipe
- Easy ingredients: A boxed cake mix does most of the measuring work for you.
- Quick preparation: The cookie dough comes together in about 10 minutes.
- Soft and chewy: The cookies have lightly golden edges with tender centers.
- Rich peanut butter flavor: Creamy peanut butter gives the cookies their classic nutty taste.
- Beginner friendly: There’s no complicated creaming technique or chilling requirement.
- Small-batch friendly: The recipe makes about two dozen cookies, making it practical for everyday baking.
Ingredients
You only need a few simple ingredients to make these cake mix peanut butter cookies.
Ingredient Notes
Yellow cake mix: A standard 15.25-ounce box works well. Use a plain yellow cake mix rather than one containing extra pudding or specialty mix-ins.
Creamy peanut butter: Regular creamy peanut butter gives the dough a smooth consistency and evenly distributes peanut butter flavor. Avoid using a very runny natural peanut butter unless you know its consistency is similar to conventional peanut butter.
Eggs: Large eggs help bind the dough and contribute to the cookies’ soft texture.
Vegetable oil: A neutral-flavored oil keeps the cookies tender without competing with the peanut butter.
Optional vanilla extract: A small amount adds extra flavor, although the cookies are delicious without it.

How to Bake Cake Mix Peanut Butter Cookies
1. Prepare the Oven and Baking Sheets
Preheat your oven to 350°F. Line two baking sheets with parchment paper or silicone baking mats.
Preparing the pans before mixing the dough means the cookies can go straight into the oven once they’re shaped. If you’re using unlined baking sheets, lightly grease them to make removing the cookies easier.

2. Mix the Cookie Dough
Add the yellow cake mix, creamy peanut butter, eggs, vegetable oil, and vanilla extract if using to a large mixing bowl. Beat with an electric mixer on low to medium speed, or stir firmly with a sturdy spoon, until everything is incorporated and a thick, soft dough forms.
The dough should be noticeably thicker than cake batter. Scrape the sides and bottom of the bowl as needed so no dry cake mix remains.

3. Scoop and Shape the Cookies
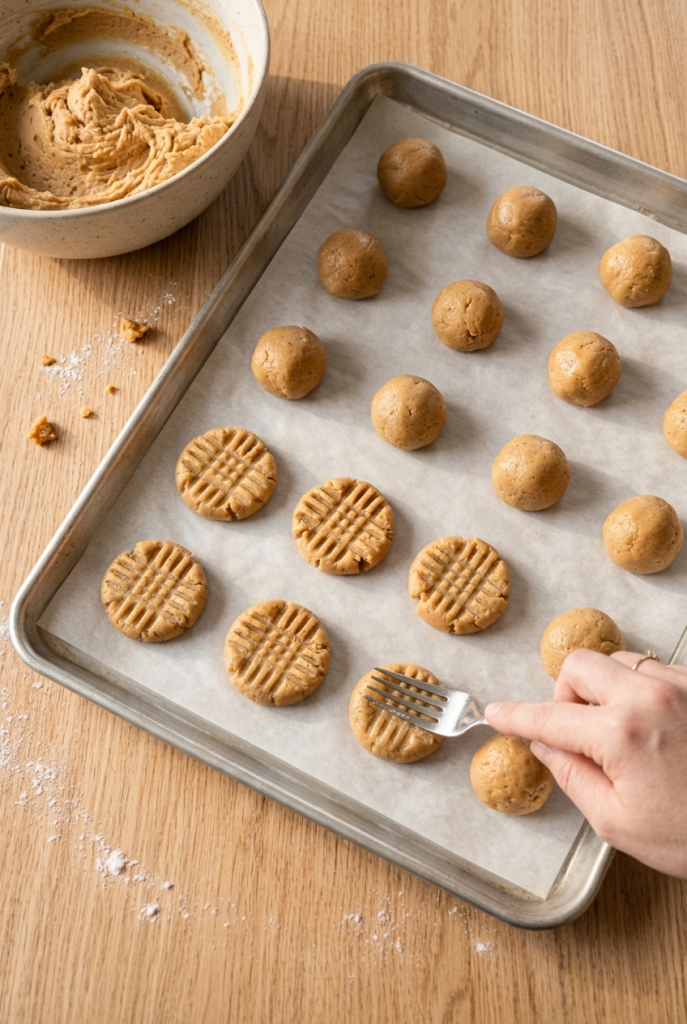
Use a cookie scoop or tablespoon to portion the dough into approximately 24 equal pieces. Roll each portion gently between your palms and place the dough balls about 2 inches apart on the prepared baking sheets.
For a classic peanut butter cookie appearance, lightly flatten each ball with the back of a fork, creating a simple crosshatch pattern. Don’t flatten them too much because the cookies should remain soft and thick in the center.
4. Bake Until the Edges Are Lightly Golden
Bake the cookies at 350°F for 9–11 minutes. Watch the edges rather than waiting for the entire cookie to become deeply browned.
The cookies are ready when the edges look set and lightly golden while the centers still appear soft and slightly underdone. They will continue to firm up as they cool.

5. Cool Before Serving
Let the cookies rest on the baking sheet for about 5 minutes. They will be delicate while hot, so this short cooling period gives the centers time to set without losing their soft texture.
Transfer the cookies to a wire rack and allow them to cool completely, or enjoy them slightly warm once they’re firm enough to handle.

Recipe Tips
- Measure the peanut butter accurately: Too much peanut butter can make the dough excessively soft and change how the cookies spread.
- Don’t overbake: The centers should still look soft when the cookies come out of the oven. Waiting for them to look completely firm can result in dry cookies.
- Keep the cookies similar in size: Even portions help all of the cookies finish baking at approximately the same time.
- Leave space between dough balls: The cookies need room to spread slightly as they bake.
- Use parchment paper: It helps prevent sticking and makes transferring the cookies easier.
- Cool them on the pan first: The cookies are fragile immediately after baking, so the first few minutes of cooling are important for their structure.
Why Do Cake Mix Cookies Stay Soft?
Cake mix contains the dry ingredients and leavening needed for a tender baked texture, while the eggs and oil contribute moisture and softness. Peanut butter adds fat and richness, creating a cookie that is more tender than a typical crisp cookie.
The key is to remove the cookies from the oven while the centers still look soft. They continue cooking from residual heat as they cool.
Variations and Substitutions
Chocolate peanut butter cookies: Use a chocolate cake mix instead of yellow cake mix for a richer chocolate-peanut butter combination.
Peanut butter chips: Fold about 1/2 cup of peanut butter chips into the dough before scooping for extra peanut butter flavor.
Chocolate chips: Add 1/2 cup of semisweet chocolate chips for a classic chocolate-and-peanut-butter combination.
Crunchy peanut butter: You can use crunchy peanut butter for added texture, although the dough won’t be quite as smooth.
Vanilla: Vanilla extract is optional. Leave it out if you want to keep the ingredient list as short as possible.
What to Serve With Cake Mix Peanut Butter Cookies
These cookies are especially good with simple drinks and desserts:
- Cold milk
- Hot coffee
- Black tea
- Hot chocolate
- Vanilla ice cream
- A drizzle of melted chocolate for a dessert-style presentation
Storage and Reheating
Refrigerator
Store completely cooled cookies in an airtight container at room temperature for up to 4–5 days. Refrigeration isn’t necessary and may make the cookies feel firmer.
Place parchment or wax paper between layers if you want to keep the cookies from sticking together.
Freezer
For longer storage, freeze the baked cookies in an airtight freezer-safe container or zip-top freezer bag for up to 2–3 months.
Freeze them in a single layer first if you want to prevent the cookies from sticking together, then transfer them to the storage container.
To serve, let the cookies thaw at room temperature. You can also warm an individual cookie briefly in the microwave if you prefer a softer, slightly warm texture.
Freezing the Dough
The unbaked dough can also be portioned into cookie balls and frozen. Arrange the portions on a lined baking sheet until firm, then transfer them to a freezer-safe container.
When baking from frozen, place the dough portions on a prepared baking sheet and allow a little extra baking time. Watch for lightly golden edges and soft centers rather than relying only on the clock.

